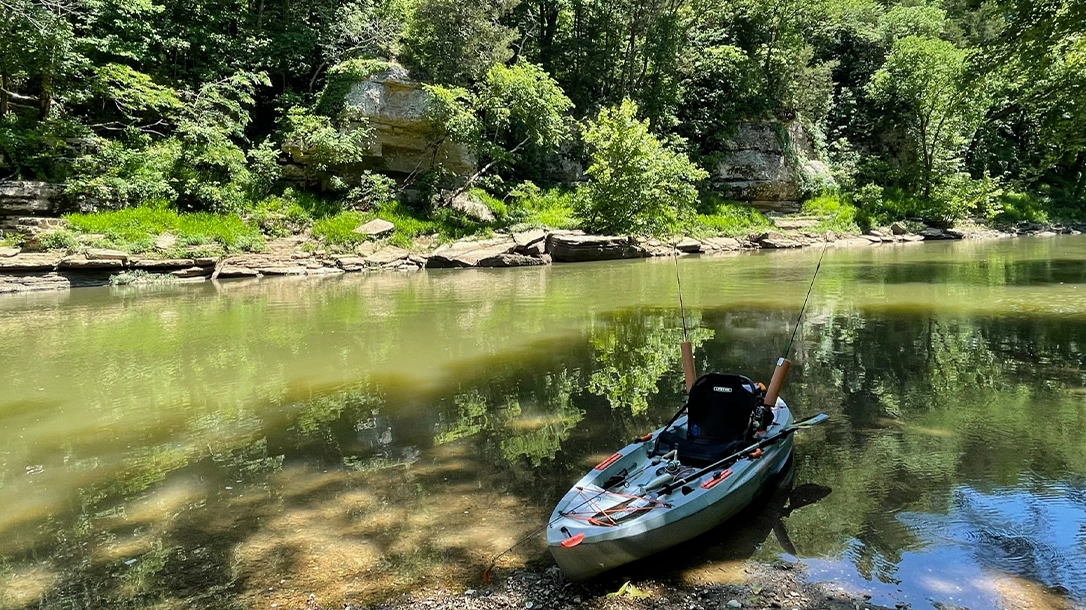
Kayaking is one of those sports that can cost you as little or as much as you want it to. If your goal is peaceful mornings on a local lake or paddling a slow river with family or friends, you can get started for a few hundred dollars and have a genuinely great time doing it. The key is knowing where the money matters most and which features truly affect performance. This guide is built for the paddler who wants a real kayak that holds up, not a glorified pool toy, but also isn’t ready to finance a kayak like it’s a bass boat or a truck payment.
Understanding the Two Main Kayak Construction Types
When you start shopping for an affordable kayak, you’re going to run into two terms repeatedly: blow-molded and rotomolded. These describe the manufacturing process used to shape the hull, and they have a real impact on how the kayak performs, how long it lasts, and what you’ll pay for it.
Blow-molded kayaks are made by blowing pressurized air into a heated plastic mold. The result is a lighter, thinner-walled hull that can be produced quickly and cheaply. Most entry-level recreational kayaks in the $200 to $400 range are blow-molded. Brands like Lifetime and Pelican lean heavily on this construction method for their budget lineups. The finished product looks clean, often has decent rigidity out of the box, and is easy to carry thanks to the reduced weight.
Rotomolded kayaks are built differently. Polyethylene resin is loaded into a mold that rotates in an oven, coating the interior walls evenly and creating a thicker, more uniform hull. The process takes longer and costs more to produce, which is why rotomolded boats typically start around $500 and can climb well past $1,000 for higher-end fishing and touring models. Perception, Pelican’s higher-tier sibling, and Old Town’s entry-level kayaks all use rotomolded construction.
Advertisement — Continue Reading Below
Durability: Where the Real Differences Show Up
Here’s where budget shoppers need to pay close attention. Blow-molded hulls are thinner, and that means they’re more vulnerable to damage from rocks, dragging across gravel launches, and repeated rough handling. They can crack under stress in ways that rotomolded hulls typically won’t. If you’re paddling flatwater lakes or calm rivers and you’re careful at the put-in, a blow-molded kayak can last for years without issue. But if you’re the type who drags your boat across a rocky bank without thinking twice, a blow-molded hull is going to show its limits faster than you’d like. The rear keel is a common failure point for this type of kayak design.
Rotomolded kayaks take serious abuse. The thicker polyethylene walls flex on impact rather than cracking, which is why you see this construction method used on whitewater boats and serious fishing kayaks that take constant punishment. A rotomolded hull that’s well-maintained can last 20 years without much fuss. They’re heavier because of that extra material, sometimes significantly so, but that weight comes with real-world toughness.
The short version: blow-molded is cheaper and lighter, rotomolded is tougher and longer-lasting. Both can serve a budget paddler well depending on how and where they’re used. Take this into consideration before making your choice.
The Lawn Chair Seat: A Small Upgrade That Makes a Big Difference
If you’ve ever spent three hours hunched over a flat foam pad trying to pass it off as a seat, you understand immediately why this matters. Most budget kayaks ship with minimal foam pad seating, and after the first 90 minutes on the water, your lower back starts sending strongly worded messages that are hard to ignore.
Advertisement — Continue Reading Below
The elevated lawn chair style seat, sometimes called a high-low seat system, is one of the better innovations to filter down into the mid-range kayak market. These seats mount to the kayak deck and can often be repositioned between a low paddling position and a raised, upright position that puts you much closer to a standard chair height. For casual paddlers, or for more challenging water, the low position keeps your center of gravity down and your stroke mechanics solid. For fishing, the elevated position is a genuine game changer.
When you’re sitting high, you get a much better sightline into the water column. Polarized sunglasses do their job more effectively. You can see structure, baitfish, and movement that you’d miss sitting nearly at water level. Casting angles improve too, especially when you’re working a shoreline or pitching into tight cover. Being able to shift your position, even just a few inches vertically, redistributes pressure points and keeps you on the water longer. It also makes standing up and sitting back down much easier from a higher sitting position. A kayak with a quality high-low seat and decent lumbar support is worth a hundred dollars more than a boat without one. Your back will agree before noon.
Wide vs. Narrow
Hull width is one of those specs that beginners often overlook until they’re white knuckling the gunwales in calm water and wondering what went wrong. Width determines stability, and stability determines what you can do once you’re out there.

Advertisement — Continue Reading Below
Wider kayaks, generally those measuring 32 inches or more at the beam, offer what’s called primary stability, meaning they feel planted and solid when you’re sitting still or making slow movements. For fishing, this matters enormously. Standing to sight-cast, repositioning for a better angle, reaching across the deck to grab gear, all these movements demand a hull that isn’t going to punish you for shifting your weight. Some wider fishing models push 36 inches across, and on flat water, you can stand and cast with real confidence.
The tradeoff is speed and efficiency when paddling. Wider hulls create more drag, which means more effort per stroke and slower forward progress over distance. If you’re covering a lot of open water to reach your fishing spot or paddling upstream in a river, a wide fishing kayak is going to wear you out faster than a narrower hull covering the same ground.
Stability, Standing, and Speed
Narrower fishing kayaks, typically 26 to 31 inches wide, slice through the water more efficiently and reward consistent paddling technique with noticeably better speed and glide. For paddlers focused on covering water, fitness paddling, or multi-hour lake crossings, the narrower hull is the right tool. The compromise is that they feel less forgiving when you’re loading gear, leaning to grab something off the surface, or making sudden movements.
The practical advice is simple. If fishing is your primary purpose, prioritize width and stability. For paddling distance or speed matters more, go narrower. If you want to do both reasonably well, look for a middle-ground hull in the 30 to 32-inch range and accept that you’re making moderate compromises in both directions. You can also increase stability with a longer kayak that is relatively narrow and still paddles efficiently, but keep in mind that additional length increases the overall weight.
Advertisement — Continue Reading Below
Sit-On-Top vs. Sit-Inside Kayaks
Beyond construction method, you need to match the kayak design to your actual paddling. Sit-inside kayaks have an enclosed cockpit and lower center of gravity, which makes them feel more stable in moving water and keeps your lower half drier in cooler temps. Sit-on-top kayaks are open, easier to get on and off, and self-drain through scupper holes. Sit-on-tops are generally better for warm water fishing and casual paddling where swimming or splashing doesn’t bother you.
Sit-on-top kayaks in the 10 to 12-foot range are the sweet spot for most budget buyers. They track well enough for lake paddling, are easy to transport on a basic roof rack or truck bed and come in both construction types across a range of prices. Longer fishing kayaks offer better efficiency on open water but cost more and are harder to store and transport. For a first boat on a budget, keep it simple.
Don’t Go Cheap on Your Paddle
Here’s the part of the budget kayak conversation that most people forget, and it genuinely shouldn’t be skipped. The paddle is half the experience. Maybe more. You can buy a solid kayak at a fair price and then completely undermine the whole investment by pairing it with a heavy, poorly designed paddle that makes every stroke feel like work.
Entry-level aluminum shaft paddles with plastic blades are heavy, flex under load, and transfer energy inefficiently. On a short paddle across a cove, you probably won’t notice. After five hours on the water, you absolutely will. Arm fatigue, shoulder strain, and a general sense that kayaking is harder than it looks are often directly attributable to a bad paddle.
Advertisement — Continue Reading Below
Where Quality Matters
A quality carbon fiber paddle changes the experience in ways that are immediately noticeable. Carbon shafts are stiff, lightweight, and transmit your stroke energy directly into forward movement instead of absorbing it through flex. Carbon blades are shaped to catch and release water efficiently. This reduces the muscular effort required per stroke across a full day on the water. Paddles from brands like Werner, Aqua-Bound, and Bending Branches offer carbon or carbon-blend options that are solid choices for beginners.
That might feel like a lot when you’re already stretching a budget to cover the kayak itself but think about it proportionally. If you spend $500 on a solid rotomolded kayak and pair it with a $40 aluminum paddle, you’ve optimized the wrong variable. A $150 carbon-blend paddle on that same $500 kayak will make the whole setup perform dramatically better and protect you from the kind of fatigue that turns a great day on the water into a miserable slog back to the launch. Budget for the paddle from the beginning. You’ll thank yourself all summer long.
What to Actually Look for When Shopping
At the budget end of the market, you’re not going to get a perfectly outfitted boat. Adjustable seats and footrests matter more than most people realize until their back hurts after an hour on the water. Look for a lawn chair style seat with real back support, not just a padded strap. Adjustable footrests let you engage your core and paddle more efficiently, which keeps fatigue down on longer trips.
Storage matters too. A basic dry hatch or even a simple bungee deck rigging in front or back gives you somewhere to stash a dry bag with snacks, sunscreen, and a rain jacket. It doesn’t have to be elaborate. It just needs to be available.
Don’t forget to check the weight capacity rating honestly against your own body weight plus gear. Budget kayaks sometimes have ratings that feel generous on paper but perform differently on the water when you’re fully loaded. Leave yourself a reasonable margin.
Advertisement — Continue Reading Below
Featured Budget Picks: Three Kayaks Worth Your Attention
By this point you understand what separates a solid budget kayak from a frustrating one. Construction method, seat design, hull width, and paddle choice all feed into whether your first season on the water is something you want to repeat or something you’d rather forget. With that foundation in place, here are three great options that represent the best combination of value, fishability, and build quality at their respective price points from my experience researching and testing kayaks. All three are relatively light and short 10-foot kayaks for throw and go paddling weighing in from 58-69 pounds.
Lifetime Tamarack Pro
The Tamarack Pro is a blow-molded kayak that earns its reputation by doing one thing exceptionally well. It paddles fast and responsively for what it costs. Most blow-molded fishing kayaks at this price feel sluggish and wide, like paddling an air mattress with ambitions.
The 31-inch-wide Tamarack Pro is genuinely nimble. It tracks well on open water, and won’t exhaust you before you reach your fishing spot. The single-position lawn chair seat is comfortable enough for a full day. Plus, with real back support that outperforms what you’d expect at this price. It’s a paddler’s fishing kayak first. If standing to cast is a hard requirement for you, this isn’t your boat. I can stand in it, but I don’t feel confident moving around or setting the hook on a fish while standing. However, if you like to explore to find fish and cover water efficiently, the Tamarack Pro is a hard value to beat at $499.
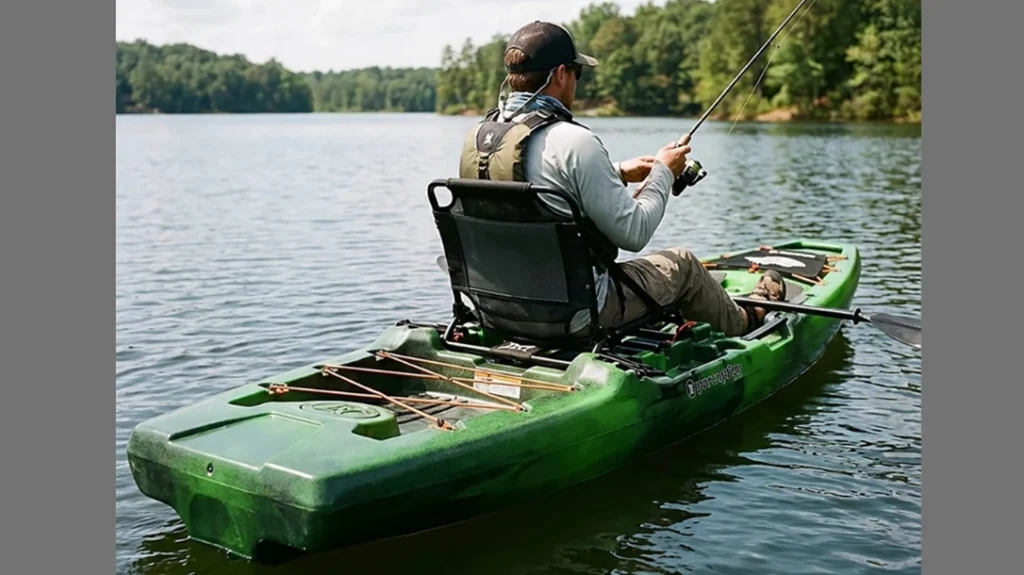
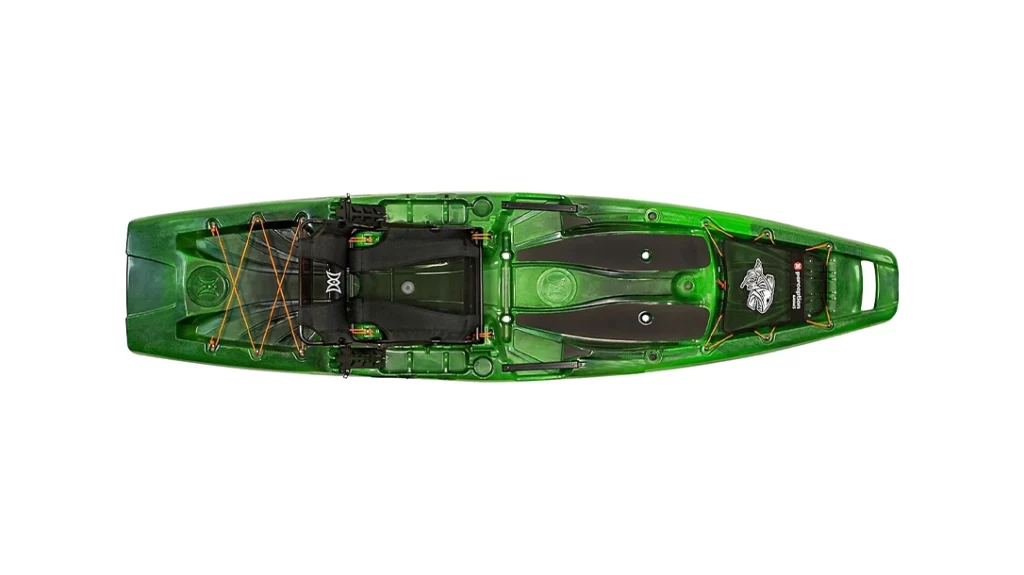
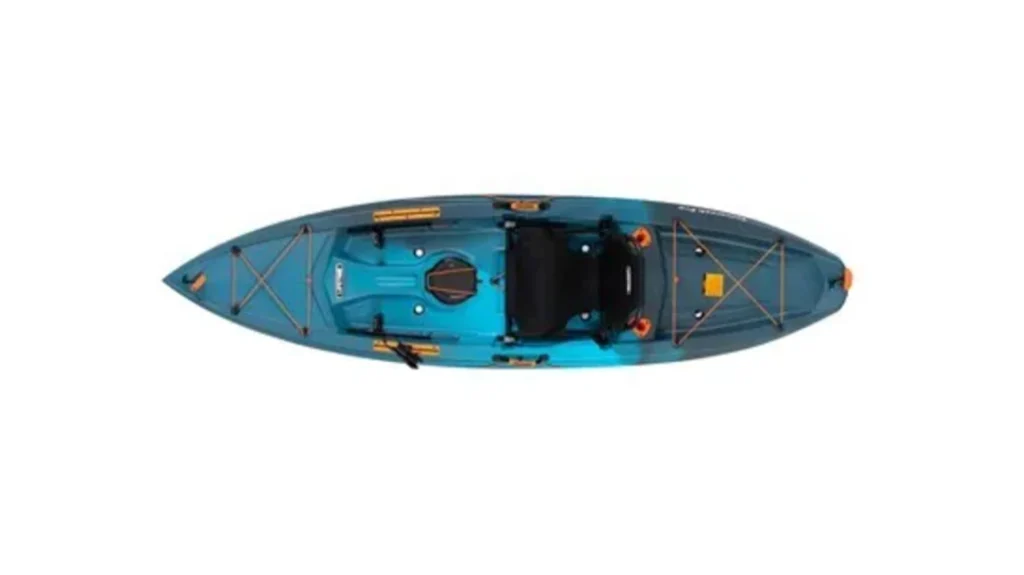
Pelican Catch Classic 100
Step up a hundred dollars from the Tamarack Pro and the Catch Classic 100 gives you a fundamentally different fishing experience. The 34-inch hull is wider and more stable, which means standing up to sight-cast or reposition is something you can do without an internal debate about losing your gear.
Advertisement — Continue Reading Below

The two-position high-low lawn chair seat is the real standout feature here. Drop it low for efficient paddling and raise it up when you’re working a shoreline. You will give up some speed and efficiency compared to the Tamarack Pro. The wider hull creates drag, and covering open water to reach a spot takes more effort. If your fishing style involves setting up on structure and working an area, the Catch Classic 100 earns every dollar.
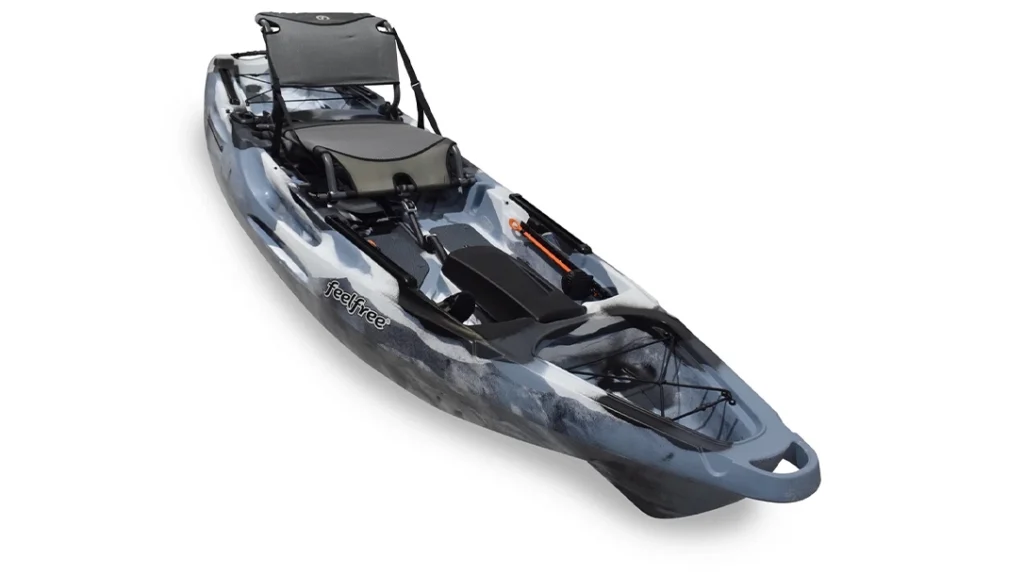
Feelfree Moken 10
The Moken 10 is where the budget category starts to blur into something more serious, and that’s not a complaint. At $799, you’re getting a rotomolded hull that will outlast the other two boats by a significant margin, a purpose-built stable standing platform that inspires confidence, and a built-in high-low seat system with better outfitting than many kayaks at twice the price.
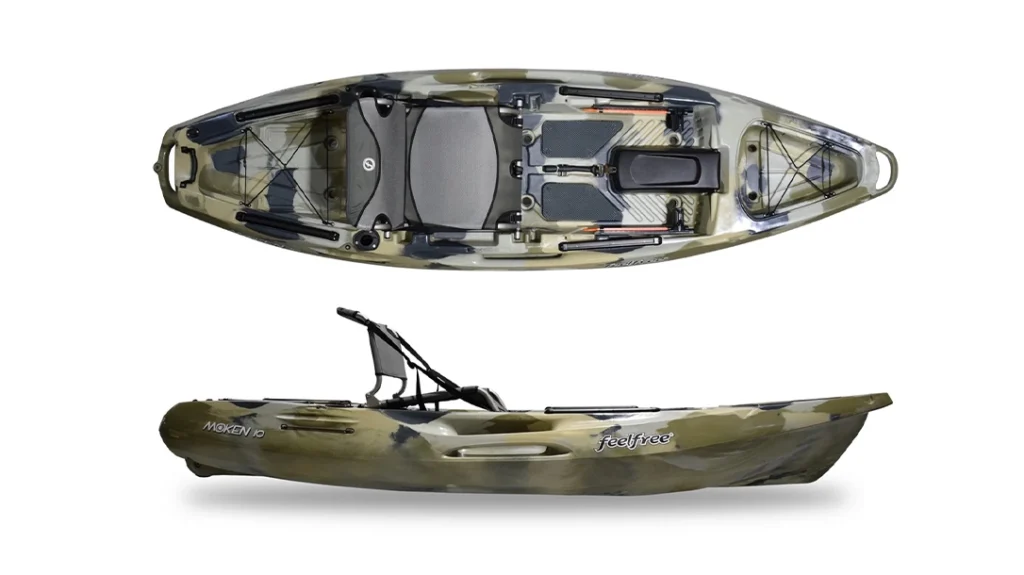
At 33 inches wide, its paddling efficiency lies somewhere between the Pelican Catch and the Lifetime Tamarak. Feelfree put real thought into how fishing kayak anglers really use their boats, and it shows in the layout, the storage options, the innovative wheel in the keel, and the overall feel on the water. If you can stretch your kayak budget to hit that $800 mark and fishing is your primary purpose, the Moken 10 is the kind of first kayak that won’t have you shopping for an upgrade two seasons later. Sometimes buying right the first time is the best budget decision you can make.
Advertisement — Continue Reading Below
Getting the Best Kayak on a Budget
Patience often pays off here. End-of-season sales in late August and September can drop kayak prices by 20 to 30 percent at big box retailers like Walmart, Academy, and Bass Pro Shops. Local dealers will also offer discounts on new kayaks and sometimes sell their demo boats at even bigger discounts. Facebook Marketplace and Craigslist are often loaded with used kayaks from paddlers who bought enthusiastically and only paddled twice. A used roto-molded kayak in good condition for $500 is a better investment than a new blow-molded budget boat at the same price.
Rotomolded kayaks also hold their value better than blow-molded kayaks. So, you could pay a little more for your first roto-molded kayak at the beginning of the season, use it all summer, and sell it for more if you decide a different kayak is a better fit for your needs. Think of it like renting the kayak for the summer.
The Bottom Line on Making the Most of Your Budget
Buying a kayak on a budget is completely doable without settling for junk. Understand what hull material and durability means for your particular needs. Buy the right design and width for the type of water you’re paddling in. Invest in a quality seat system and a carbon paddle. Those three action items will put you in the right setup. The kayak gets you on the water, and the right paddle and seating setup keep you out there all day. Get both right from the start and you’ll wonder why you waited so long to start paddling.
WHY OUR ARTICLES/REVIEWS DO NOT HAVE AFFILIATE LINKS
Affiliate links create a financial incentive for writers to promote certain products, which can lead to biased recommendations. This blurs the line between genuine advice and marketing, reducing trust in the content.